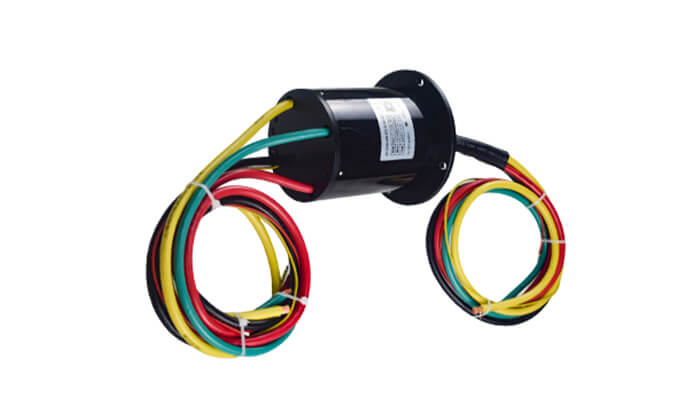
Electrical slip rings are ingenious devices that enable the transfer of power, signals, and data between rotating and stationary components. While there are various commercial options available in the market, some DIY enthusiasts may be intrigued by the idea of creating their own electrical slip rings. In this article, we delve into the world of DIY slip rings, unraveling the secrets of how to make one from scratch. So, if you’re curious about crafting your very own electrical slip ring, read on!
- Understanding the Basics of Electrical Slip Rings
- Gathering the Necessary Components and Tools
- Step-by-Step DIY Slip Ring Assembly
- Important Considerations
Understanding the Basics of Electrical Slip Rings
Before diving into the DIY process, it’s crucial to have a solid understanding of the basic components and principles behind electrical slip rings. A typical slip ring consists of a stationary part (stator) and a rotating part (rotor) connected through brushes or contacts. The brushes maintain electrical contact with conductive rings or tracks on the rotating part, allowing the transmission of power and signals across the rotating interface.
Gathering the Necessary Components and Tools
To embark on your DIY electrical slip ring project, you’ll need to gather a few essential components and tools:
a) Conductive Rings or Tracks: Look for suitable conductive rings or tracks that will serve as the electrical pathway between the stationary and rotating parts. These can be obtained from online suppliers or salvaged from old electronic devices.
b) Insulating Materials: Select insulating materials to separate the conductive rings or tracks and prevent short circuits. Materials like plastic or nylon washers can be used for this purpose.
c) Brushes or Contacts: Acquire brushes or contacts that will maintain electrical contact with the conductive rings or tracks. Carbon brushes or metal spring contacts are commonly used in slip ring construction.
d) Mounting Mechanism: Consider how you will mount the slip ring assembly onto your rotating component. This can vary depending on your specific application and the available resources.
e) Soldering Equipment: You’ll need soldering equipment, including a soldering iron, solder, and flux, to connect the components and ensure reliable electrical connections.
f) Basic Tools: Other basic tools such as wire cutters, pliers, and a small drill may be necessary for cutting and preparing wires and making holes for assembly.
Step-by-Step DIY Slip Ring Assembly
a) Prepare the Conductive Rings: Start by ensuring that the conductive rings or tracks are clean and free from any debris or oxidation. If necessary, clean them using a gentle abrasive material or a specialized cleaning solution.
b) Insulate the Rings: Place insulating washers or materials between each conductive ring to prevent electrical short circuits. Ensure the insulation is secure and stable.
c) Attach Brushes or Contacts: Position the brushes or contacts in a manner that allows them to maintain contact with the conductive rings as they rotate. Secure them using suitable mounting mechanisms or fixtures.
d) Establish Electrical Connections: Use soldering equipment to solder wires onto the brushes or contacts, creating electrical pathways. Make sure the solder joints are strong and secure to ensure reliable connections.
e) Test the Slip Ring: Once the assembly is complete, perform thorough testing to ensure proper electrical continuity and minimal resistance. Rotate the slip ring and check for any disruptions in power or signal transmission.
Important Considerations
When making your own electrical slip ring, keep the following considerations in mind:
a) Safety: Always prioritize safety when working with electrical components. Take necessary precautions, such as wearing safety goggles and working in a well-ventilated area.
b) Application Requirements: Determine the specific requirements of your application, including the number of circuits, voltage and current ratings, and signal types. Ensure that your DIY slip ring meets these requirements.
c) Limitations: DIY slip rings may not match the performance and reliability of commercially available options. Consider the limitations and potential risks associated with homemade slip rings.
d) Continuous Improvement: Treat your DIY slip ring as a learning experience. Assess its performance and identify areas for improvement. Iterate on your design and construction techniques to enhance functionality.
Creating your own electrical slip ring can be a fascinating and rewarding DIY project for enthusiasts seeking to understand the inner workings of these essential components. By gathering the necessary components, understanding the principles, and following a step-by-step assembly process, you can craft a functional slip ring for your specific application. However, it’s important to remember that DIY slip rings may have limitations compared to commercially available options. With proper care, continuous improvement, and a thirst for knowledge, you can embark on a journey of exploration and experimentation in the realm of electrical slip rings.
See What We Can Do

